
Qwen Image Edit Camera Angle Control
Upload one image, choose the direction, height and distance, and get the same subject from a new camera angle. Try three free images, no sign-up.
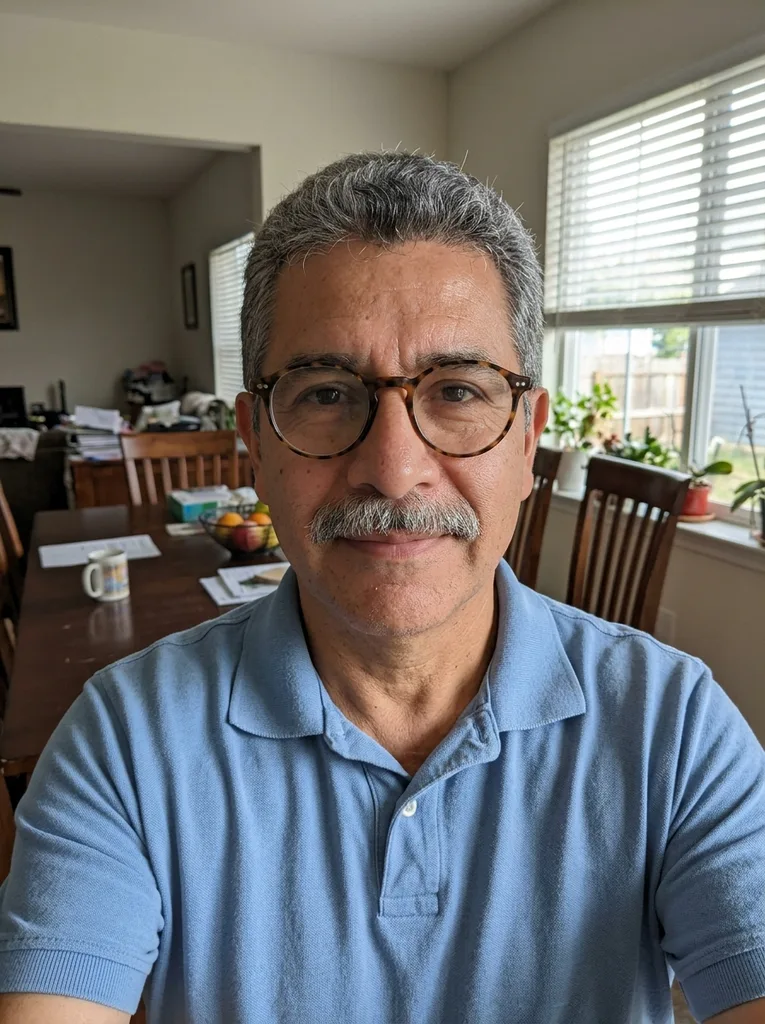 Before
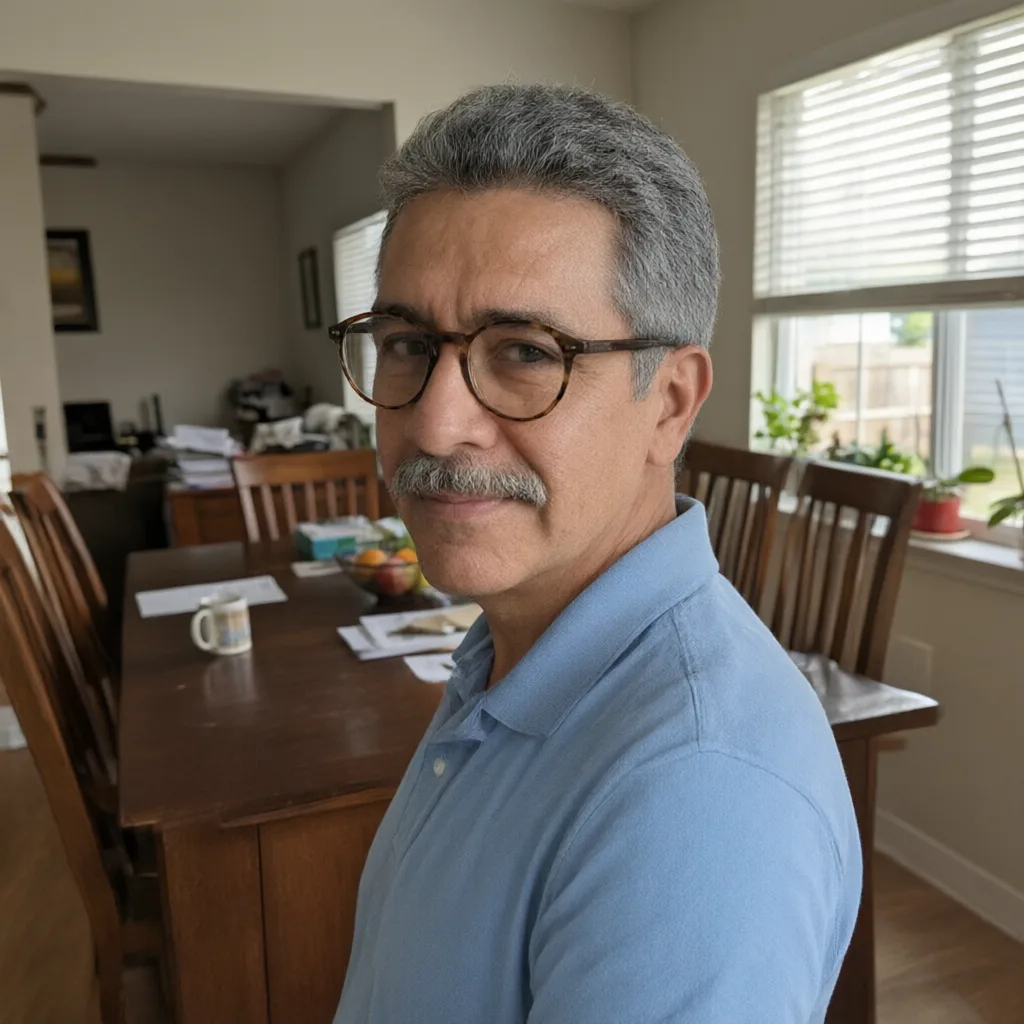 After
Example result. Upload your photo to make yours.
Examples
BeforeAfterQwen Image Edit Camera Angle Control: 96 Positions
Qwen Image edit camera angle control moves the camera around your subject instead of changing the subject. You choose three things. Direction is the orbit: Front 0°, Front-right 45°, Right 90°, Back-right 135°, Back 180°, Back-left 225°, Left 270° or Front-left 315°. Height runs from Low angle −30° through Eye level 0° up to High angle 60°. Distance is Close-up, Medium or Wide.
That makes 8 × 4 × 3 = 96 camera positions, and there is no prompt to write. The tool turns your three choices into the camera instruction for the model, so a first-time user and a ComfyUI veteran get the same simple form. Use the 45° steps for a natural turnaround and the 90° steps for clean side views.
What a Big Turn Has to Invent
A photo only shows one side. A 45° turn mostly reuses what is visible, so it stays close to the original. At Back 180° the camera sees a side your photo never showed, so the model has to draw it.
It is told to keep the same people, clothes, objects and lighting. Treat the result as AI output: compare it with your original, and check details such as text, logos and small parts.
In our test runs on one photo of a person at a table, Front-right 45°, Left 270° (a true side profile), Back 180° and a steep High angle 60° view each came out as asked, with the same person.
How to Use Qwen Image Edit Camera Angle Control
Three choices after one upload.
- 1
Upload one image
Add a JPG, PNG, WebP or HEIC file up to 10 MB with a clear main subject. This page takes exactly one image, and a new upload replaces the old one.
- 2
Pick direction, height and distance
Choose one option in each group; the defaults are Front-right 45°, Eye level and Medium. You can also set the aspect ratio. Changing a choice after a result needs a new run.
- 3
Run and download
Press the button to get one image from the new camera position, shown next to your original. Download it before you reload the page, because the last result is not saved.
Camera Angle Control Input Tips
Small choices that decide how well the new view holds up.
- Show the whole subject, because cut-off parts have to be guessed in the new view.
- Start from a front or near-front shot, so the turn has a clear reference.
- Use even light and a clear subject, with little clutter around it.
- Pick the angle by purpose: 45° for a product or portrait turnaround, 90° for a profile or side reference, and Wide when the room matters.
- Try 45° or 90° first and save Back 180° for when you need it.
- After a back or side view, check text, logos and small details against the original.
- Choose all three settings before you run, since each run uses part of your three free images.